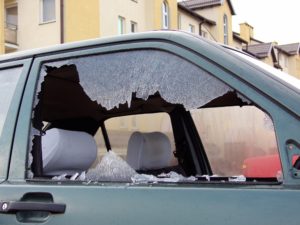
 Although the movies make it look easy, modern car windows are notoriously difficult to break. But that doesn’t mean they’re indestructible. Even a minor accident can send glass shards scattering across the cabin.
Even worse, it could take several weeks for the new window to arrive at the auto shop. So how do you keep your car comfortable and safe in the meantime? You’ll want to apply a temporary fix.
Don’t leave your car open to the elements—or to thieves. Instead, read our guide and learn how to temporarily fix a broken car window.
1. Gather the Supplies
You can create a broken car window cover all at once. For the easiest and most efficient job, gather everything you’ll need so you don’t have to run back and forth between your house and the vehicle.
There are two popular sealing methods. Each method requires its own set of equipment. But they do share some items in common.
Here’s what you’ll need to bring no matter what:
- An industrial vacuum (shop-vac)
- Protective handwear
- A soft cloth and source of water
- Paper towels
Now you’ll have to choose between the two sealing methods. You can use either a garbage bag or masking tape to provide a temporary car window. The tape method is generally preferred, but either decision is acceptable.
For the garage bag method, you’ll also need:
- A clear, large trash bag
- Duct tape or other adhesive
- Scissors
If you’d rather perform the tape seal, bring two rolls of masking tape, in addition to our essential tools listed above.
Creating a broken car window cover is a quick job. While you’re out there, consider bringing a few extra tools along to squeeze in other DIY auto repair projects.
2. Clear Broken Glass
Glass remnants in the window frame are a health hazard and make it more difficult to fix a broken car window. The first order of business is carefully cleaning the glass both in the frame and vehicle.
Put on your pair of protective gloves to shield your hands from sharp edges. With care, pull the glass shards away.
Depending on how your window broke, you may have to use an industrial vacuum, such as a shop-vac, to remove any remaining pieces. Use this shop-vac to pick up shards within the cabin as well. With the window set in its closed position, run the vacuum along the seal of the window and remove any lingering glass shards trapped within the door.
3. Prepare the Window
Now that the glass is out of the way, it’s time to prep the frame for our temporary car window. Dirt and glass remnants can affect the future seal and adhesive power. For that reason, don’t skip this step.
Wet a cloth and run it around the surface of the cleared window frame. It’s best to leave your protective gloves on during the process, just in case. Soap isn’t necessary, but be thorough and make several passes to ensure you’ve collected as much dirt as possible.
Take a few paper towels and pick up any remaining moisture, drying off the surface for the last step.
4. Apply the Trash Bag
We’ll first cover the process for the trash bag cover. If you’re following the masking tape method, please jump ahead to the next section.
Hold up the transparent garbage bag against the open window. Use your scissors to cut out a portion of plastic that’s slightly larger than the window frame.
Now take your duct tape and adhere the upper portion of the plastic to the interior frame. With the plastic is in place, use one hand to stretch the bag as taut as possible. You don’t want a baggy fit as it will obstruct your driving vision.
Holding the bag taut, tape down another side of the transparent bag. Continue this process until all sides of the plastic cover are held in place.
Now run the duct tape around the inner perimeter of the broken window, ensuring it seals against the plastic frame. This will create a watertight seal and provide more wind resistance.
5. Create the Tape Seal
Not using a garbage bag? Here’s what to do with the masking tape:
Within the vehicle, adhere one end of the masking tape to the top of the window frame and drag it to the other side. With your scissors or your hands, break the tape off and set it in place.
Follow the same process with a new strip of tape, below and interlaced with the first, until you’ve created a screen of masking tape over the open window. Some car owners use larger types of tape, such as packing tape. While effective, these can damage your vehicle’s paint and aren’t advised.
On the exterior, run the masking tape around the window’s perimeter, just as you would with the garbage bag method. However, the tape method has a final step.
Create a lattice of tape strands across the exterior of the window. Two separate tape covers, complete with a watertight divider, creates a robust temporary car window. If you’re paranoid, you can add layers of tape over the existing boundaries for additional protection.
When it’s time to remove the masking tape, follow this guide to keep your paint intact.
How to Temporarily Fix a Broken Car Window
Ideally, you’ll head to a mechanic to repair a broken car window right away. But whether you’re on a road trip or waiting for an appointment, it’s not always an option. That’s why every car owner should know how to temporarily fix a broken car window.
Since you read this article, you clearly don’t shy away from DIY car repair and maintenance. Download your car repair manual so you always have a copy on hand.